Lab-P1: Running Programs
Welcome to your first lab! This semester, you're going to learn how to write your own Python code. But for this lab, you're just going to practice running some Python programs we give you.
Important: Before going to the lab, install Anaconda with Python 3.11 on your laptop. We've created videos showing how to do this on Windows and Mac. Please make sure that all checkboxes are checked during the Windows installation.
If you have already installed Python or Anaconda before this semester, please uninstall and reinstall, following the instructions in these videos. Please do not upgrade your Python version anytime during the semester. We expect you to retain Python 3.11 throughout this semester.
As a reminder, labs are a part of your grade and are meant to be guided by a TA/peer mentor. Thus, in-person attendance is mandatory (unless you are a CS319 student or an AmFam student).
The lab is divided into Segments. Each segment will introduce a new concept to you, and will build on concepts introduced in earlier segments. If you ever get stuck on any segment, please feel free to reach out to your TA/peer mentor.
This lab also contains Tasks. Pay attention to these, as you'll be expected to be able to do similar tasks on your own moving forward.
Learning Objectives
After completing this lab, you will be able to...
- download files from GitLab,
- use basic terminal commands,
- run a Python script,
- understand and use absolute and relative paths,
- create and run a Jupyter Notebook,
- download and run a Jupyter Notebook.
Commonly used Terminal/PowerShell commands
Here are a list of Terminal/PowerShell commands that you shall be learning more about, in this lab. You can refer to this section if you need to be reminded of what the different commands do.
| Command | Function | Example |
|---|---|---|
pwd |
displays path of current directory | pwd |
ls |
lists files in current directory | ls |
cd |
changes the current directory | cd "C:\Users\myname\Documents\cs220\lab-p1" |
mkdir |
makes a new subdirectory inside the current directory | mkdir lab-p2 |
cat |
displays the contents of a file | cat hello.py |
python/python3
|
executes Python script | python hello.py |
jupyter notebook |
open Jupyter notebook from current directory | jupyter notebook |
Segment 1: Download Your First Program
The first thing you're going to need to decide is where to keep your work this semester.
Task 1.1: Create the folders for this lab
Create a folder named cs220 under Documents. Then, inside the new cs220 folder, create a sub-folder called lab-p1 and use it for all your files related to this lab.
To find Documents...
Windows Users
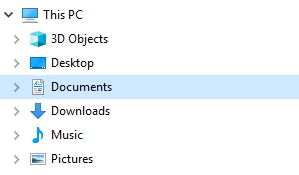
Open File Explorer and select Documents:
Mac Users
Open Finder and select Documents:

Before we begin the next task, let's learn about the term file extension. When you have a file named somefile.some_extension, the part after the . is called the file extension. A .py extension refers to a Python program. Other examples of a file extensions include: .txt (text file), .docx (document file), and .xlsx (spreadsheet file).
To show file extensions, you will need to...
Mac Users
-
Open
Finderwindow and click onFinder(menu) >Preferences:
-
Navigate to
Advancedand enableShow all filename extensions:
Windows Users
-
In your
File Explorer, ClickView>Show>File name extensions:
Task 1.2: Download the file hello.py to your lab-p1 folder
We strongly recommend using Google Chrome browser, throughout this semester. Other browsers might add unpredictable extensions to your files and they might not work as intended.
At the top of this page, you'll see a list of files, something like this:

Downloading files from GitLab (the site hosting this document) is a little tricky for those new to it. Try this:
-
Right-click on
hello.py. -
Choose
Save Link As...(or similar). -
Navigate to your
lab-p1folder in the pop-up. -
Ensure that you download file with the proper extension:
- Windows users: ensure that
Save as typeis notText Document, but is eitherPython FileorAll Files.

- MAC users: ensure that you have followed the above Finder settings steps before this step. Replace the
.txtextension with.py.


- You should be following this process for all downloads from GitLab. Here is another example: if you are downloading a
.ipynbfile, you should make sure the extension is exactly.ipynband not.txt.ipynbor.txtor.ipynb.txt.
- Windows users: ensure that
-
Hit Enter.
Alright, we've downloaded our first Python file! Or have we?
Task 1.3: Open a terminal emulator aka a Terminal.
Windows:
- Hit the Windows logo key on your keyboard.
- Type
powershell. - Open
Windows PowerShell(be careful, do not choose the ones that sayISEorx86). - Pin this application to Start bar. If you don't know how to do this, please do a Google Search.
Mac:
- Open Finder.
- Click
Applications. - Open
Utilities. - Double-click
Terminal.app. - Pin this application to Dock. If you don't know how to do this, please do a Google Search.
We're going to talk more about terminals later - don't worry too much about the details yet.
Task 1.4: Copy the pathname of your lab-p1 folder.
- Open your
cs220folder in either File Explorer or Finder. - Copy the pathname of
lab-p1using either these Windows directions or Mac directions. - Paste the pathname of
lab-p1in your notes somewhere.
Task 1.5: Navigate to the lab-p1 directory.
Directory is just a fancy word for folder. You can use them interchangeably. The command to change directories is cd, which stands for Change Directory. The directions are the same for Mac and Windows. Type the following in the terminal (replace LAB-P1-PATH with the pathname of lab-p1, which you copied above; keep the quotes around the pathname, though) and hit Enter:
cd "LAB-P1-PATH"So if my lab-p1 pathname is "C:\Users\myname\Documents\cs220\lab-p1", I'd type:
cd "C:\Users\myname\Documents\cs220\lab-p1"If you're using a Mac, your slashes will point the other way. This isn't a big deal... for now.
cd "/Users/myname/Documents/cs220/lab-p1"WARNING: Remember to paste the pathname inside quotes (i.e., cd "LAB-P1-PATH" instead of cd LAB-P1-PATH).
Otherwise, you might get an error that says you have too many arguments.
Task 1.6: Use cat to inspect hello.py.
Just type cat hello.py in your terminal and press Enter. As one might guess, cat command enables you to look into the contents of a file.
Wooooooooah! That's a lot of stuff. Wait a minute... we've been bamboozled! This is an HTML file! Delete this impostor hello.py using your file explorer!
So, this is the incorrect way of downloading files from GitLab, when you encounter any error while running your program which lists \<!DOCTYPE html\>, then you followed these wrong steps to download the program file.
Task 1.7: Correctly Download a Python file
After noticing our mistake, let's download hello.py the correct way:
- At the top of this page, Left-click on
hello.py. - Right-click on the
Open raw( ) button. In Chrome/Brave, right-clicking the
 Open rawbutton looks like this:
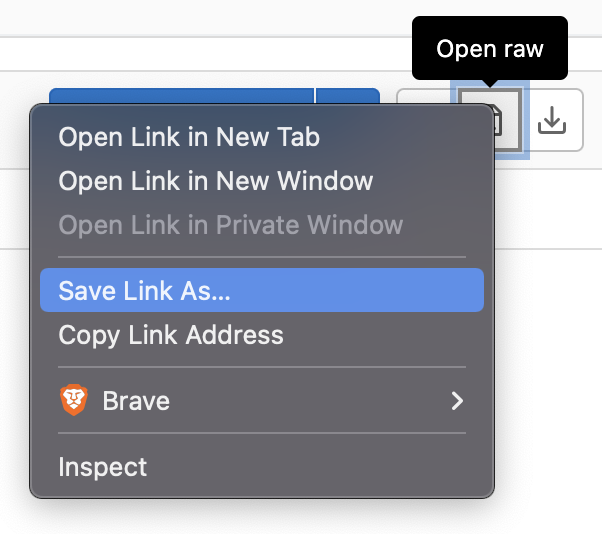
- Choose
Save Link As...(or similar). - Navigate to your
lab-p1folder in the pop-up. - Ensure that you download file with proper extension:
- Windows users: ensure that
Save as typeis notText Document, but is eitherPython FileorAll Files. - MAC users: replace the
.txtextension with.py.
- Windows users: ensure that
- Press Enter.
- For image reference, please go back to Task 1.2.
- Type
cat hello.pyin your terminal and press Enter. If you downloaded the file correctly, you should now see:
print("Hello, World!")Warning: Verify that your file is saved as hello.py and not hello.txt or hello.py.txt. Reminder: we recommend you use the Chrome browser to avoid issues (other browsers might automatically change extensions of files to .txt when downloaded).
Segment 2: Run Your First Program
A path is how a computer knows where a file is, and a pathname describes a path. Put simply, a pathname is a more complete name for a file or folder.
hello.py is just a file name. C:\Users\myname\Documents\cs220\lab-p1\hello.py and /Users/myname/Documents/cs220/lab-p1/hello.py are pathnames. The former is a pathname on Windows and the latter on a MAC or Linux. Windows and MAC or Linux use a different path separator, that is \ (Windows) and / on MAC or Linux. Eventually, you will learn how to handle the \ (Windows) versus / difference in a generic manner.
Task 2.1: Use a Shell command to list the contents of the lab-p1 folder
The Shell command we will use is ls (LS, but lowercase) to LiSt and inspect the contents of the lab-p1 folder.
Type ls in the terminal and press Enter. If you've done everything correctly so far, you should see the hello.py file that you downloaded in Task 2 listed.
Task 2.2: Run hello.py.
Type python hello.py and press Enter. Note that you may need to instead type python3 hello.py, depending on your setup (on most Mac setups, you'll be typing python3). If everything is working correctly, you should see the following message printed:
Hello, World!Congrats, you just executed your first Python program!
Segment 3: Use Terminal to run Shell Commands
You should have a terminal open that's working in your lab-p1 directory. You have already tried examples for three shell commands, which are: cat <filename>, cd <pathname>, ls. Shell is a program that is run by the terminal application. Shell commands are commands that you type within your terminal window.
Why learn about terminal?
- Typing on keyboard is way faster than using a mouse (also good for your wrist)
- Mastering Terminal will enable you to work on a remote or cloud-based computer
Let's learn more about shell commands.
Task 3.1: Use pwd (Print Working Directory) to see your working directory.
In your Terminal, simply type pwd and press Enter.
You should see that the output looks something like C:\Users\myname\Documents\cs220\lab-p1.
The important part is the end: cs220\lab-p1.
Let's learn about two different types of paths:
- Absolute paths:
- full path name to your file or folder.
- there can be only one absolute path to a single file or a single folder.
- example:
C:\Users\myname\Documents\cs220\lab-p1\hello.pyand/Users/myname/Documents/cs220/lab-p1/hello.py.
- Relative paths:
- specifying the part of the path relative to current working directory (CWD).
- example: assuming you are inside the
Documentsdirectory (that is, you have executedcd "C:\Users\myname\Documents"orcd /Users/myname/Documents), thencs220\lab-p1orcs220/lab-p1are examples of relative paths to thelab-p1directory. - unlike absolute paths, there could be multiple ways of specifying relative paths. Let's say you are inside
Documents\cs220orDocuments/cs220. Then the relative path tolab-p1will just belab-p1. For the samelab-p1directory, we were able to use two different relative paths from two different locations.
Task 3.2: Navigate to the parent directory of lab-p1, which is cs220.
Remember how we used cd to go directly to a specific directory using its absolute pathname? We can also use cd to move around the file system using relative paths. To go to the parent directory, we use:
cd .... is a special reference. It always refers to the parent directory of the current working directory.
Task 3.3: Use pwd to verify that you are now in the cs220 directory.
Task 3.4: Use Shell commands to make a directory for next week's lab.
Use mkdir, that is MaKeDIRectory, to make a lab-p2 directory.
Here's how:
mkdir lab-p2
Task 3.5: Use ls to verify that a cs220 now contains lab-p1 and lab-p2.
Task 3.6: Navigate back to the lab-p1 directory.
Since lab-p1 is so close to our current(working) directory, we don't have to use the absolute pathname of lab-p1. We can use a relative path.
You can probably guess that we have to use cd. So let's type that first (without pressing Enter!), followed by a space:
cdNow press Tab, that key right above your Caps Lock. What happens? Press it multiple times. You should see suggestions. This can be useful when navigating. This useful shortcut saves you a lot of typing time!
Either one of the following will work:
cd lab-p1OR
cd .\lab-p1\The above options are identical. .\\ for Windows and ./ for Mac mean relative to the current directory. The \\ or / after lab-p1 indicates that lab-p1 is a directory.
As an additional exercise, consider the following...
Windows:
ls ..\Mac:
ls ../What do you think this does?
Segment 4: Use a Jupyter Notebook to run Python code
You'll be doing the majority of your coding this semester in Jupyter Notebook files. Let's make one.
Task 4.1 Start up a Juptyer Notebook
You should have a terminal open that's working in your lab-p1 directory. We will be creating a new Jupyter Notebook called lab-p1.ipynb.
In your terminal, type jupyter notebook and press Enter. This should open up Jupyter as a web page in your browser. If it doesn't, and you've already carefully followed our video install instructions (links at the top of this page), please immediately ask for help -- there are probably some tricky configuration issues remaining.
WARNING: Your Terminal window should now look something like this:

Even though we'll be working in the web browser now, NEVER close this terminal window where you typed jupyter notebook until you're done -- if you do, Jupyter will crash and you will lose any unsaved work.
If you need to use other Terminal/PowerShell commands, open a new Terminal/PowerShell window.
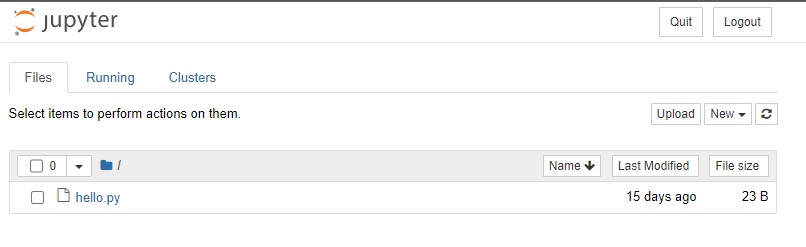
If everything works properly, you'll see something like this (notice you can see your downloaded files in Jupyter):
Click New, then Python 3. A new tab like this should open:
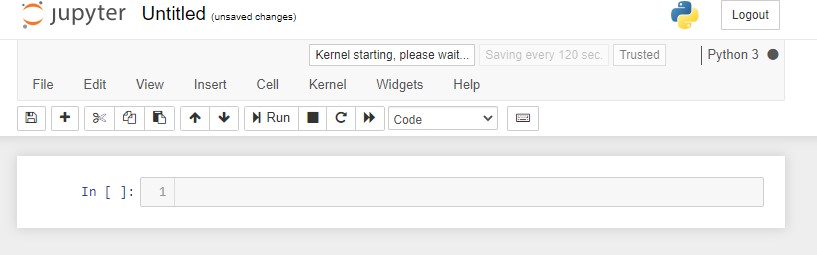
Notice how it says Untitled at the top? Click that word, type lab-p1, then click Rename or press Enter.
Task 4.2: Write and run code in your Jupyter Notebook
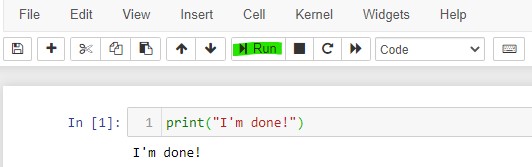
Jupyter notebooks have cells where you write code. Cells are these rectangular boxes where you can type code... We're going to write one line in a cell (copy-paste the below code):
print("I'm done!")To run this cell, click the Run button in the toolbar, which is highlighted green in the image below. You should see the output below the cell, as pictured.
Alternatively, you can click Kernel & Restart & Run All.
Task 4.3: Save your notebook.
Jupyter's autosave is quite unreliable, so make sure to frequently hit the save button. It is the save icon. The keyboard shortcut for this would be command + s or ctrl + s.
Task 4.4: Download a different Notebook file.
Download main.ipynb using the same steps as Task 1.7. Make sure that the extension is .ipynb. Now refresh the browser tab containing the jupyter notebook homepage. You should be able to see main.ipynb in the list of files. Open main.ipynb and run the cell containing the code.
Most lectures will have live-coding examples, so you will be doing this step at the start of each lecture.
Segment 5: Reading Code
Before we move onto the next program, let's have a look at hello.py again.
Remember that you are currently running Jupyter on your previous Terminal window.
So, you cannot execute any more Shell commands from that window. Instead, you must
open a new Terminal/PowerShell window, and navigate back to the lab-p1 directory
on the new Terminal. Do not close the old Terminal/PowerShell window unless you want
to close your Jupyter notebook.
Task 5.1: Use cat to see the contents of hello.py.
You should see the following:
print("Hello, World!")What you're looking at is the code for the hello.py program. Feel free to use cat in the following steps to view the code of other programs.
Task 5.2: Download double.py to your lab-p1 folder.
At this point, you should still have a terminal that is working in your lab-p1 folder (aka directory).
Task 5.3: List the contents of your lab-p1 directory.
It should contain hello.py, lab.ipynb, main.ipynb, and double.py.
Task 5.4: Run double.py.
Type the following and press Enter (Reminder: most of the MAC users will have to type python3 instead of python):
python double.pyThe program will say please enter a number:. This is known as a prompt (a fancy way to say a program is asking you a question).
Type 5 and press Enter. Make sure that the program tells you the answer is 10.0.
Task 5.5: Use Up Arrow to view previous commands
While using the terminal, press the up arrow key to scroll through the previous commands.
If you press the up arrow key once, the prompt should show python double.py again. You can use the up and down arrow keys to go through your command history. Press Enter to run double.py, and this time try entering a negative number.
Let's run double.py one last time, but now when you're prompted for a number, enter the word five.
Do you see something like this?
Traceback (most recent call last):
  File "double.py", line 2, in <module>
    print("2 times your number is " + str(2*float(x)))
ValueError: could not convert string to float: 'five'
When you see the word Traceback, it means the program crashed. The double.py program can only accept digits so it crashed when you typed something else. Eventually, we'll learn how to understand what gets printed when a program crashes to identify the root of the problem, but for now we won't worry about it any further.
Congrats on finishing your first CS220 lab! You do not need to submit anything for the labs. The labs are designed to prepare you for the project and help you engage in the lab sessions run by TAs and peer mentors. Your TA will come around to check that you finished and enter your lab attendance points on Canvas.
It is recommended that you try to finish P1 right away during lab hours, so you can fix any installation issues with the help of your TA and peer mentor. Good luck with P1!