-
Anna Meyer authoredAnna Meyer authored

- lab2: Python Modes and Programming
- Learning Objectives
- Segment 1: Interactive Mode (Python Shell)
- Task 1.1: Determine your Python version.
- Task 1.2: Use pwd to verify that you are in the lab2 directory.
- Task 1.3: Start Python in interactive mode.
- Task 1.4: Run Python in interactive mode.
- Task 1.5: Try running a shell command in interactive mode.
- Task 1.6: Exit interactive mode.
- Task 1.7: Try running Python code in the shell.
- Task 1.8: Re-enter interactive mode
- Task 1.9: Evaluate Python expressions
- Task 1.10: Exit interactive mode.
- Segment 2: Boolean Logic, Order of Operations, and Modular Arithmetic
- Task 2.1: Download bool.ipynb, ops.ipynb, and mod.ipynb
- Task 2.2: Open Jupyter in your lab2 folder.
- Task 2.3: Complete the bool.ipynb notebook.
- Task 2.4: Complete the ops.ipynb notebook.
- Task 2.5: Complete the mod.ipynb notebook.
- Segment 3: Script mode (IDLE editor)
- Task 3.1: Open IDLE
- Task 3.2: Write some code in IDLE.
- Task 3.3: Run code in IDLE.
- Task 3.4: Use Python interactive mode in IDLE.
- Task 3.5: Investigate how script mode handles code that doesn't use print().
- Task 3.6: Run the Python program you wrote from the shell (back to your terminal).
- Task 3.7: circle.py program
- Segment 4: Otter tests check for project submission
lab2: Python Modes and Programming
In the lecture this week, we learned about three ways to run Python: interactive mode, script mode, and notebook "mode" (people outside of CS220 won't use that vocabulary for notebooks, hence the quotes). In this lab, you'll practice those three modes. You'll also get practice with operators, modular arithmetic, and Boolean logic.
To get started, please create a lab2 directory inside your cs220 directory (if you haven't already). Then, open a terminal and use cd to navigate to lab2 (review the steps from lab1 in case you are unsure of how to use cd and/or get the pathname of the lab2 directory).
Learning Objectives
After completing this lab, you will be able to...
- Run Python code using interactive mode, script mode, and notebook "mode",
- Write Python expressions containing mathematical, comparison, and Boolean operators,
- Identify correct operator precedence order,
- Apply parentheses to override operator precedence in your expression when needed,
- Translate English statements into Python expressions,
- Write correct Boolean expressions with subparts separated by Boolean operators of
orandand.
Segment 1: Interactive Mode (Python Shell)
Let's start by looking at interactive mode, where code is executed one line at a time. Interactive mode is typically used for doing quick syntax checks. For a new Python programmer, the interactive mode is very helpful to try out simple examples.
Task 1.1: Determine your Python version.
Run python --version in the terminal. You might see something like this:
Python 3.10.6If it says something like 2.X.X, try running python3 --version instead. If you need to run the latter, please use python3 whenever we say python in the directions this semester.
Many commands support some type of version argument. How do you think you could figure out the version of Jupyter?
NOTE: If your Python version is NOT 3.9.X or 3.10.X, then you have failed to install Python as per the specifications of this course, and this may cause some unexpected errors in future projects. Right now, you should continue with this lab with your current version of Python (as long as everything is working, currently). But it is recommended that you attend Office Hours and install the correct version of Python to prevent problems later in the summer.
Task 1.2: Use pwd to verify that you are in the lab2 directory.
The command pwd is a command line argument that stands for Print Working Directory.
If the pwd command prints out a different directory path than your lab2 directory path, use cd commands to move to the correct working directory. See lab1 if you don’t recall how to use cd commands to navigate to a directory.
Task 1.3: Start Python in interactive mode.
Type python and press Enter.
You should see something roughly like this (details will vary):
Python 3.9.13 (main, Aug 25 2022, 23:51:50) [MSC v.1916 64 bit (AMD64)] :: Anaconda, Inc. on win3
Type "help", "copyright", "credits" or "license" for more information.
>>>
Those >>> symbols are a Python prompt. This means you can type Python code, but your shell commands will not work until you exit Python again. Recall that we learned about shell commands in lab1. Examples of shell commands include cd, ls, mkdir, etc.
Task 1.4: Run Python in interactive mode.
Try typing this Python code:
print("hi")then press Enter. The message hi should be printed.
Task 1.5: Try running a shell command in interactive mode.
Ensure you still see the >>> prompt, then type pwd again and press Enter. This should give you the following error because pwd is only valid in the shell (not Python):
Traceback (most recent call last):
  File "<stdin>", line 1, in <module>
  NameError: name 'pwd' is not defined
Task 1.6: Exit interactive mode.
You can exit the interactive mode by typing in exit() and pressing Enter (which works on both Mac and Windows).
Alternatively, on Mac, you can do this with Control + D (hold down the Control key, then press the D key at the same time).
Alternatively, on Windows, you can use Control + Z and Enter (hold down the Control key, then press the Z key at the same time; release both, then press the Enter key).
Task 1.7: Try running Python code in the shell.
Now that you've exited, try running both pwd and print("hi") again. This time, the former should work and the latter should fail (because we're in the shell, and the former is a shell command whereas the latter is Python code).
Task 1.8: Re-enter interactive mode
Type python and press Enter.
Task 1.9: Evaluate Python expressions
Type each of the below expressions, predict the output and then press Enter, to confirm that you are getting the expected output.
10/410//410%4not Falsenot not Truenot not not True2*1000-
"2"*1000(what's the difference between this one and the previous one?) -
2**1000(and what about this one?) -
1/0(should fail) "ha"*100"ha\n"*100print("ha\n"*100)print("ha\n\n"*100)
Task 1.10: Exit interactive mode.
That's the end of the first segment! Take a moment to summarize for yourself what you learned. If you aren't sure about anything above, feel free to ask Anna or Adi for help. If you feel good, move on.
Segment 2: Boolean Logic, Order of Operations, and Modular Arithmetic
In this section, you'll get more practice downloading and running existing notebooks.
Task 2.1: Download bool.ipynb, ops.ipynb, and mod.ipynb
You can find them in the lab2 folder of this GitLab Repo - which is where you are now. Download these files to your local lab2 folder.
You need to follow the same procedure as you did to download files in lab1. In other words, do the following:
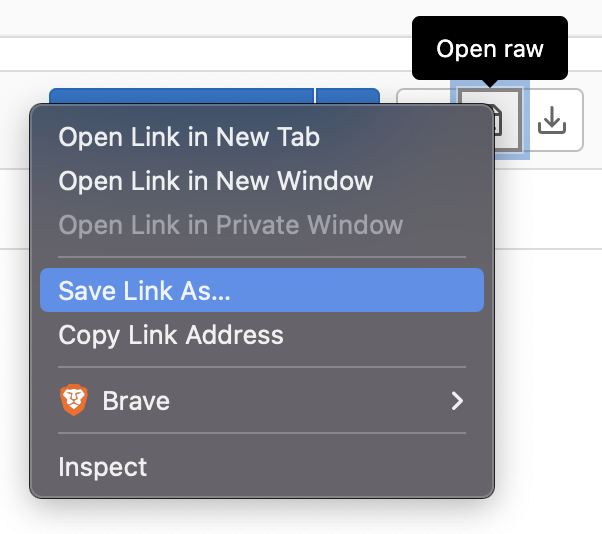
- At the top of this page, Left-click on the file you want to download (for example, say
bool.ipynb). - Right-click on the
Open raw( ) button.
 - Choose
Save Link As...(or similar) as in this image below.
- Navigate to your
lab2folder in the pop-up. - Ensure that you download the file with the proper extension:
- Windows users: ensure that
Save as typeis notText Document, but "All Files". - MAC users: replace the
.txtextension with.ipynb.
- Windows users: ensure that
- Press Enter
(Note that on some Macs, save link as isn't working. If so, the Download button should work instead - just check that the file type is .ipynb.)
Warning: Verify that your file is saved as bool.ipynb and not bool.txt or bool.ipynb.txt. Reminder: we recommend you use the Chrome browser to avoid issues (other browsers might automatically change extensions of files to .txt when downloaded).
Task 2.2: Open Jupyter in your lab2 folder.
Go back to your open terminal. If you have closed it, review Task 1.2 to verify you are in the lab2 directory. Now run jupyter notebook. You should see something like the following:
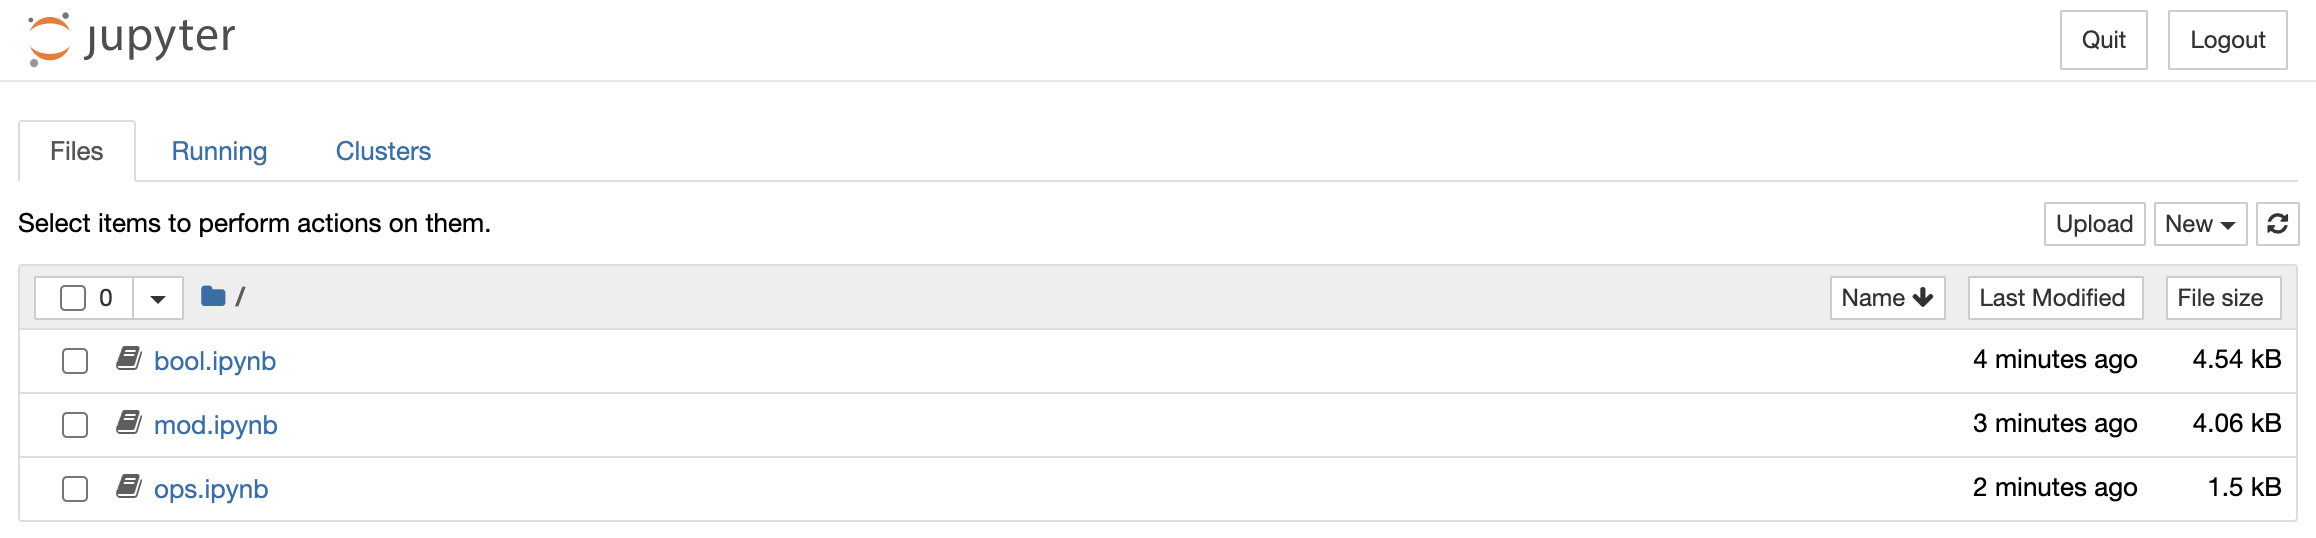
You can now click on any of the three notebooks you've downloaded to view the contents. The exercises you should do with each notebook are described below.
WARNING: Your Terminal window should now look something like this:

Even though we'll be working in the web browser now, NEVER close this terminal window where you typed jupyter notebook until you're done -- if you do, Jupyter will crash and you will lose any unsaved work.
If you need to use other Terminal/PowerShell commands, open a new Terminal/PowerShell window.
Task 2.3: Complete the bool.ipynb notebook.
Open the notebook, complete the directions in each cell, and run the cell. If you are unsure of what to do, ask your TA/PM.
Task 2.4: Complete the ops.ipynb notebook.
The ops.ipynb notebook is split into 2 sections. It is very important for you to
carefully go through the second section in particular. As a new programmer, you will learn some very important lessons in this section, which will help you avoid some nasty bugs in your code.
Task 2.5: Complete the mod.ipynb notebook.
The mod.ipynb notebook will teach you about 'modular arithmetic' and is also split into 2 sections. In the first section, you will get acquainted with modular arithmetic, and in the second section, you will use modular arithmetic to solve a few simple word problems.
Segment 3: Script mode (IDLE editor)
Script mode is the most commonly used mode for writing production Python code (that is code written at a company). In this course, we will only be writing code in notebook "mode". So this section will be the only place where you will briefly learn about script mode.
Now let's look at IDLE, which will help us write a Python script.
Task 3.1: Open IDLE
Remember that you are currently running Jupyter on your previous Terminal window.
So, you cannot execute any more Shell commands from that window. Instead, you must
open a new Terminal/PowerShell window, and navigate back to the lab2 directory
on the new Terminal. Do not close the old Terminal/PowerShell window unless you want
to close your Jupyter notebook.
We will now create a new file called laugh.py in IDLE (short for Integrated Development and Learning Environment, but it's a fancy text editor). From Shell mode (that is, not Python interactive mode), type idle laugh.py. This would normally open up a file named laugh.py in IDLE if it already existed, but since it doesn't, it will create a new empty file named laugh.py.
If you are using macOS, try the command idle3 laugh.py
Warning: If you are using macOS and the idle3 laugh.py command did not work, then directly open IDLE from Finder and save the new file as laugh.py.
Task 3.2: Write some code in IDLE.
Paste the following into the editor:
print("ha " * 10 + "!")Task 3.3: Run code in IDLE.
From the run menu, click Run Module (saving your file if necessary); or, you can accomplish the same by pressing F5 on your keyboard.
You should see a new window pop up. In this window, you should see:
ha ha ha ha ha ha ha ha ha ha !along with >>> underneath. What do you think those arrows signify?
Task 3.4: Use Python interactive mode in IDLE.
Type or paste print("hello") in the pop-up >>> prompt and press Enter.
Now close the pop-up.
Task 3.5: Investigate how script mode handles code that doesn't use print().
Remove the print in your file, so it looks like this:
"ha " * 10 + "!"Run your code again (e.g., with F5). Notice how it doesn't show any of your output? In interactive mode, prints usually aren't necessary, but they are in script mode. Add back the print, save, then close any IDLE windows that are open.
Task 3.6: Run the Python program you wrote from the shell (back to your terminal).
python laugh.pyDid it work? If you are on a MAC, try python3 laugh.py if python laugh.py fails.
Task 3.7: circle.py program
Let's try to create a second program:
- Run
idle circle.py(idle3 circle.pyon macOS) - Paste
print((8/2)**2 * 3.14) - Run the program (either in idle with
F5, or by exiting idle and runningpython circle.pyin the shell)
The program computes the area of a circle. Can you figure out what the diameter of that circle is by reading the code?
That's the end of this segment! Take a moment to summarize for yourself what you learned.
Segment 4: Otter tests check for project submission
This segment is informational only and has no tasks. Starting with project P2, your work is not complete when you submit the project on Gradescope. It is your responsibility to make sure that your project clears auto-grader tests on the Gradescope test system. Otter test results should be available in a few minutes after your submission. You should be able to see both PASS / FAIL results for the 20 test cases and your total score, which is accessible via Gradescope Dashboard.
You must review the project's rubric and make sure that you have followed the directions provided in the project to solve the questions. The rubric is meant to reinforce your understanding of the project's directions. TAs and graders will be following the rubric to make deductions on your project submission during manual grading. Rubrics will become progressively stricter as we make progress during this semester.
To get full credit for this lab, you must acknowledge to Anna that you understand Segment 4's instructions.
If you finished early, you can get started on P2! Good luck!